I was told about a tool that has been out for a while to build High Performance Enterprise Java Applications. Its name is Spring Roo. I've been playing around with this tool, and I find it very productive, usable and learnable. It's amazing how you can build a Java Web-based applications by just running 10 commands. This post will show the basic steps of how to build High Performance Enterprise Java Applications with Spring Roo, but after that, I will talk a little bit more about Spring Roo Architecture and Add-ons features, and additionally, I will guide you on how to create and debug a Spring Roo Java Web-based Application.
Spring Roo Architecture
Spring Roo is based on different technologies that support both back-end and front-end solutions. Roo includes technologies such as Java Persistence API (JPA), Spring Framework dependency injection and transactional management, JUnit tests, a Maven build configuration and MVC-based front-end that uses JSP to represent information to the end users. The Spring Roo version 1.1.0.M1 includes support for GWT, which will help you create the front-end web-based solution using the architecture used by Google Production Applications. GWT on Spring Roo version 1.1.0.M1 is not completely supported. Features like field reference and browser history are not still set up for GWT on the current version.
Add-Ons Features
Spring Roo distribution provides two major components, the "Roo Core" and the "Roo Add-ons". You will find more information about Spring Roo base Add-Ons on Spring Roo Reference documentation. Using Spring Roo Add-ons commands will help you create a web-based Java Application quickly and easily.
Creating and Debugging a Spring Roo Java Web-based Application
Creating and debugging and Spring Roo application is easy and quick. The following will guide you on how to create Spring Roo Java Web-based application in a few steps:
- Download and install Spring Roo. You might download SpringSource Tool Suite to edit your code after created. Once you have downloaded it, install it.
- You might want to add roo core command--roo.sh for Unix and roo.bat for Windows systems-to your PATH environment variable. This will help you avoid typing the absolute path every time you want to run roo core.
- After having completed the steps above, open a shell console and create a folder called Acme. This folder will hold the project files for the Acme project. After creating the folder, get in it to start creating the Spring Roo application.
- Type roo.sh for Unix or roo.bat for Windows. After having run roo core command on the console, start type--or copy & paste--the following roo add-ons commands:
- After installing logging, quit roo shell console and run the project using either tomcat or GWT on debug mode. To do this, just type mvn tomcat:run or mvn gwt:run if you want to debug either on tomcat or gwt dev mode.

//This command will create Java Maven-based project with all dependencies and artifacts needed
project --type java.lang.Integerproject --topLevelPackage com.acme --projectName Acme
//This command will set up persistence layer in your project with several aspects
persistence setup --provider HIBERNATE --database HYPERSONIC_IN_MEMORY

//This command will create a domain object--POJO--with integrated unit test
entity --class ~.server.domain.Client --testAutomatically
//This commands below will add fields to the Client POJO added above
field string --fieldName firstName --sizeMax 25
field string --fieldName lastName --sizeMax 25 --notNull
field date --type java.util.Date --fieldName dateOfBirth --notNull

//This command will create Web MVC controllers for all JPA entities
controller all --package com.acme.web
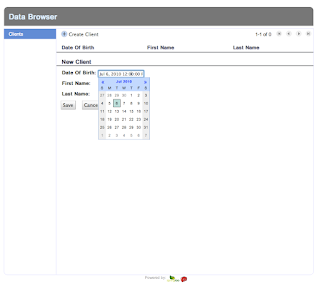
In addition to creating Web MVC controllers using JPSX, you can additionally set up scaffold GWT front-end views to interact with you back-end solution.
//This command will create a front-end solution--Model-Acivity-DTO.
gwt setup

Now that everything is almost done, we can optionally install logging in the application to observer the behavior of itself.
//This command will setup logging in debug mode
logging setup --level DEBUG
Spring Web-based MVC Framework
I hope this little tutorial will be useful for you. Even though some features for GWT need to be developed, Spring Roo will help us build Java Web-based application quick and easy. I'm pretty sure that new features and support will be added in the versions to come.


2 comments:
Nice post. I tried Spring Roo too, and it's easy to get an application running. However upon further investigation I was disappointed with the generated code. Too much dependency on Spring Roo annotations and the use of aspects was excessive for our taste.
We're currently looking at MyEclipse for Spring. Upon initial review of generated code it looks really good, but we have more work to do.
Bart,
I respect your point. I know nothing about MyEclipse for Spring. The great future about aspects is that all this code is injected, and that will help increase performance in our applications.
I'm sure that Spring Roo won't satisfy all your needs, but it's a good started to build an Java Web-based Application :)
Post a Comment